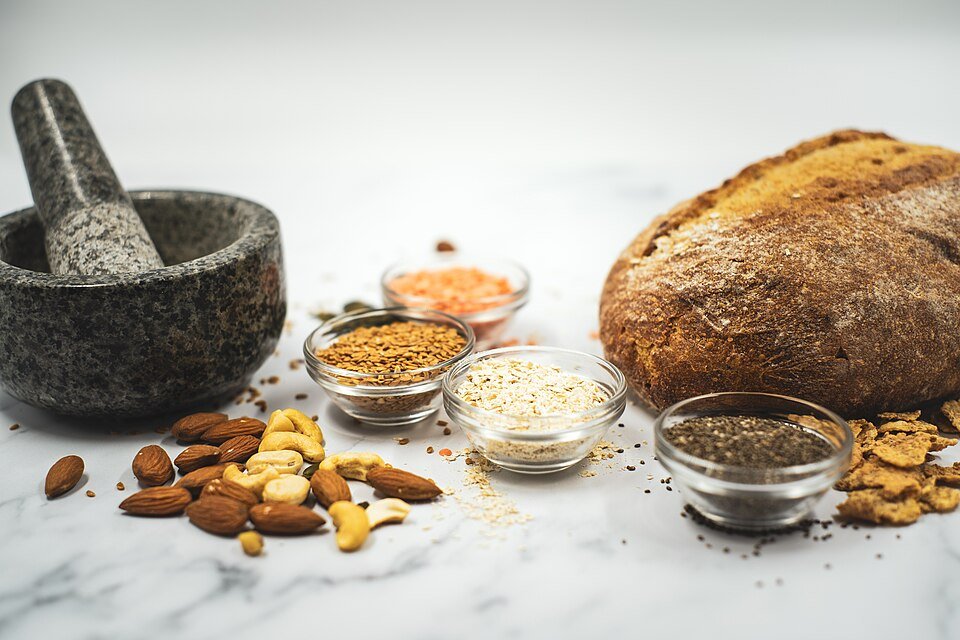
The Right Fibre for Better Bowel Movements
When it comes to digestive health, fibre is often hailed as the hero. But for many people, eating...

How to make crispy Vietnamese Banh Xeo at home
Banh Xeo, often described as Vietnamese sizzling pancakes, holds significant cultural importance within Vietnamese cuisine. With its roots...
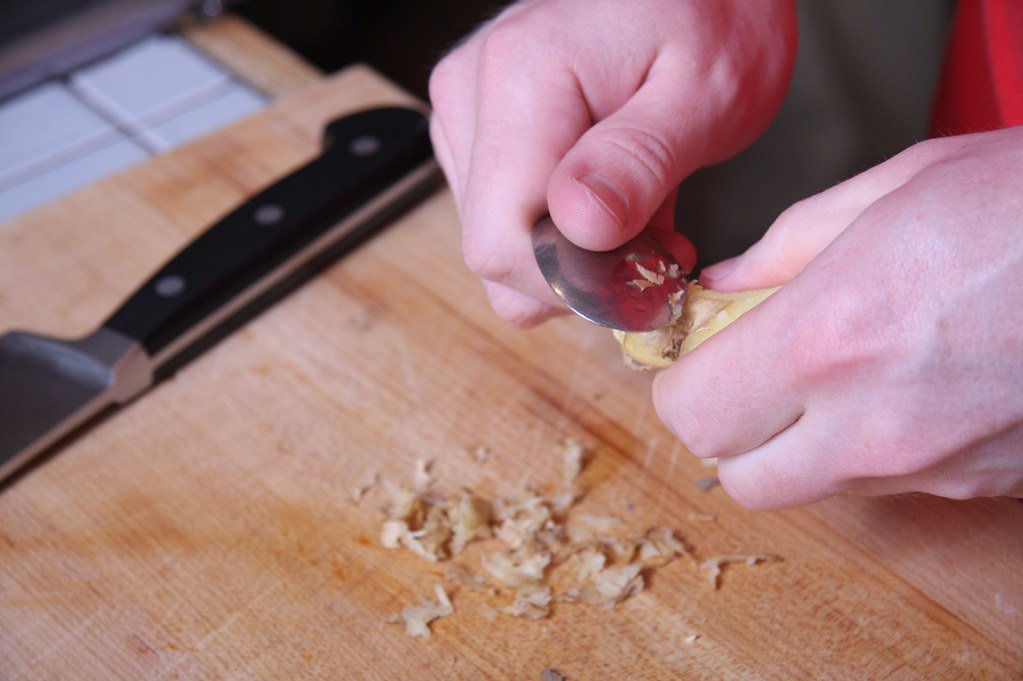
Ginger peeling tips you can use at home
Peeling ginger can be tricky because of its knobby, irregular shape. While a vegetable peeler or a knife...
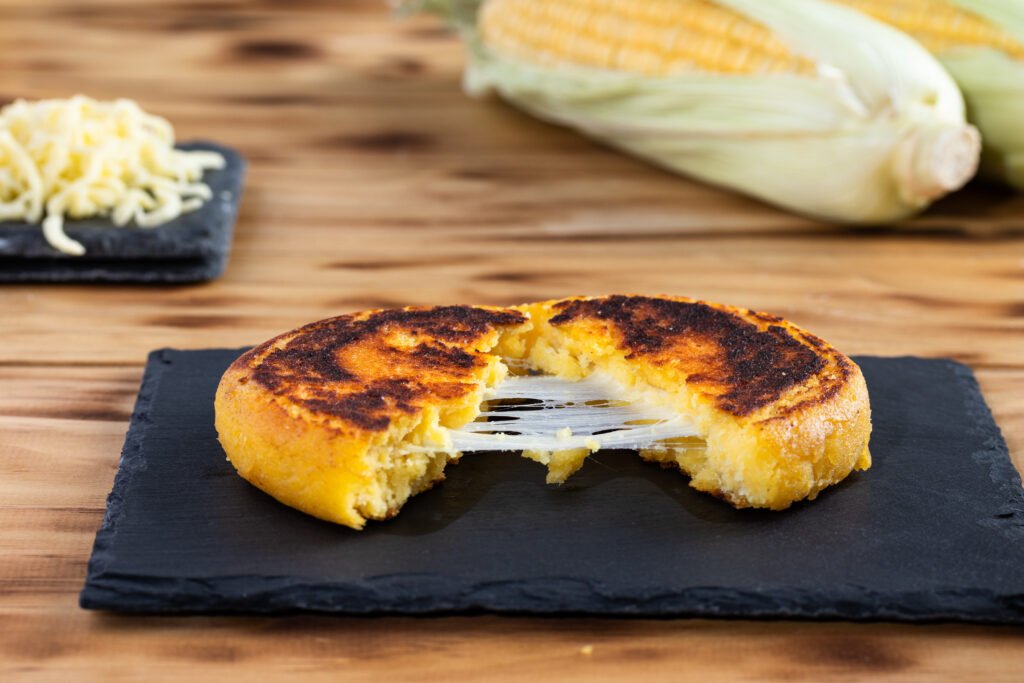
Easy Colombian Cheese Arepas for Quick Breakfast
Introduction to Arepas Arepas are a traditional staple in Colombian cuisine, made primarily from ground maize dough. These...
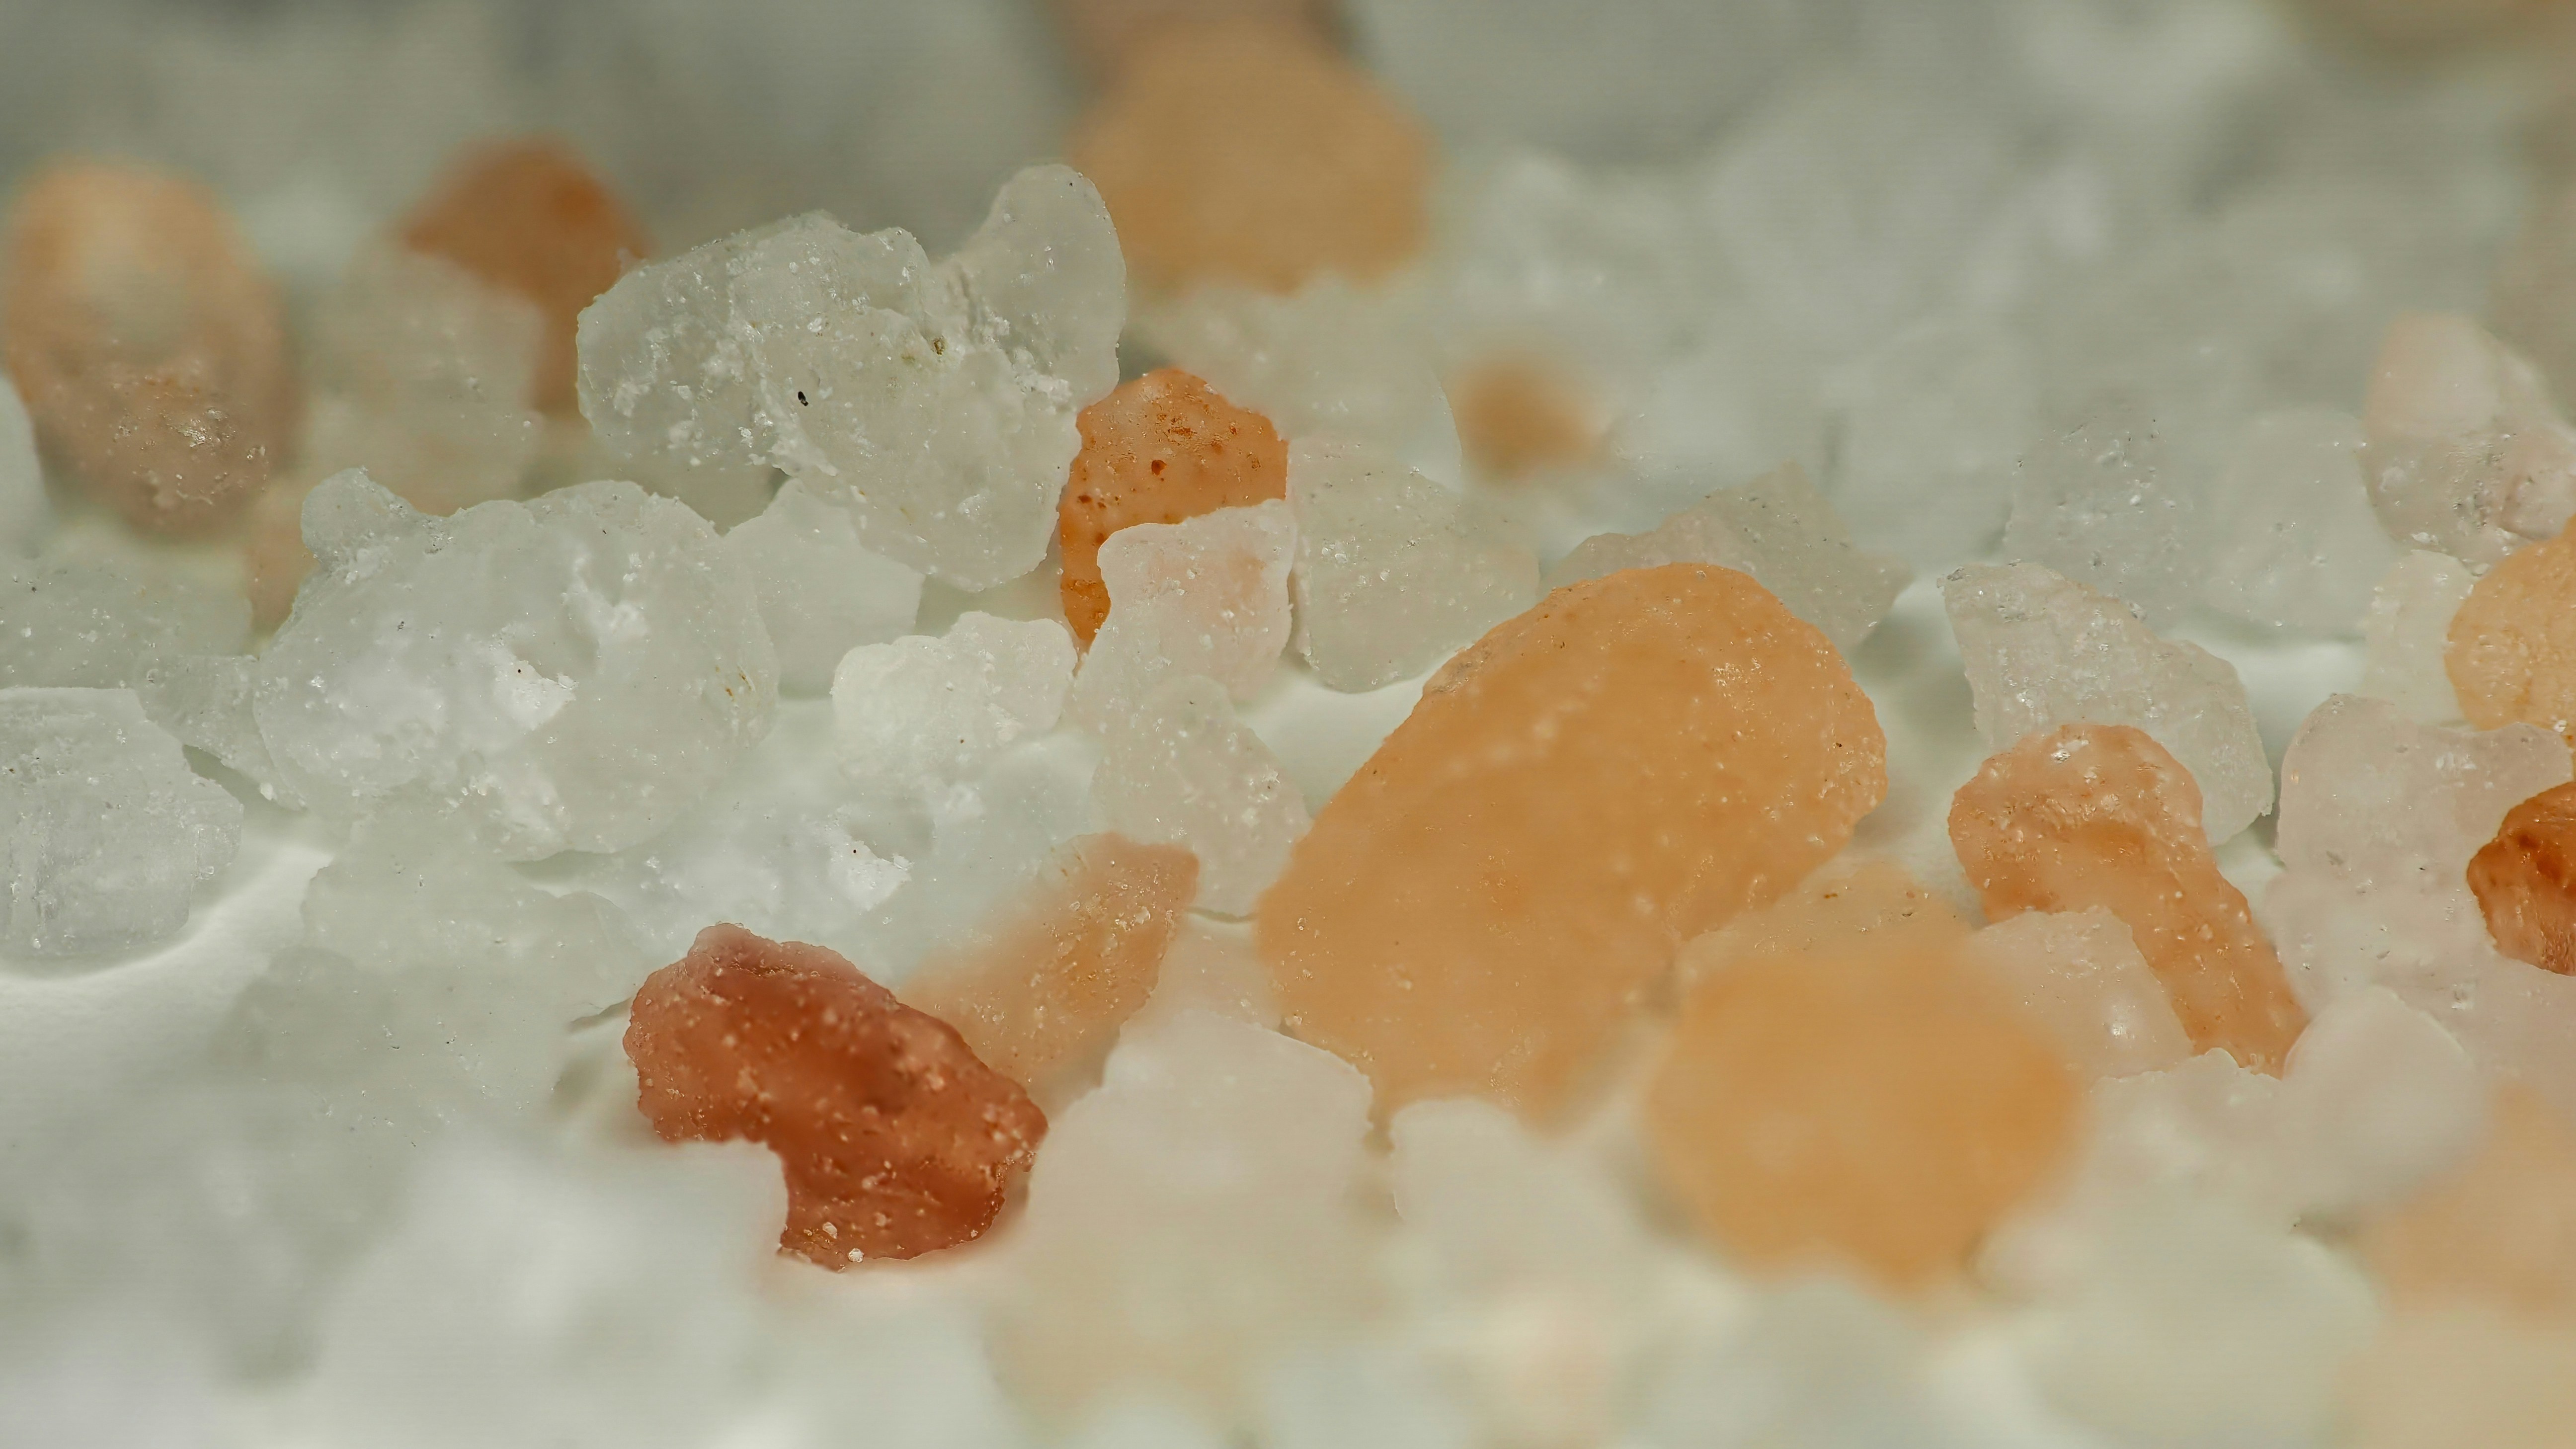
The Differences Between Sea Salt and Table Salt
Salt is an essential mineral that has played a pivotal role in human history, serving not only as...
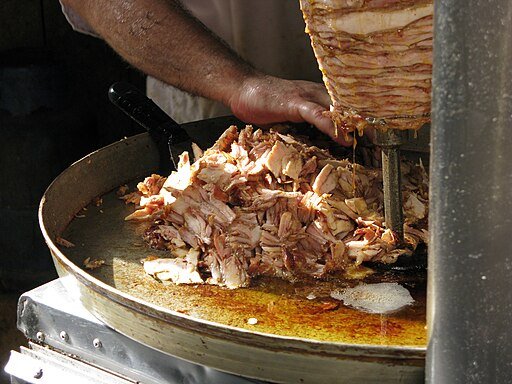
How to Make the Best Homemade Chicken Shawarma
The secret to great Shawarma lies in three key elements: 1. The Marinade: A well-spiced marinade is essential...
How food affects your mood
Your food affects your mental health and can empower you to make healthier choices that support your wellbeing....

Bitter Kola benefits and recipes
Bitter kola, also known as Garcinia kola, is a tropical fruit native to West Africa used for centuries...

What is Suya Spice?
Suya spice, also known as Yaji, is a flavorful, spicy blend originating from Nigeria and has gained international...

Where to sell your homemade food
Selling homemade food can be rewarding. Whether you’re a seasoned chef, a passionate home cook, or the owner...

How to ripen plantains quickly
If you’ve found yourself with green or underripe plantains and need them ready to cook sooner rather than...

How to develop a food business concept
A food business concept is the foundational idea or theme that defines your food business. It is the...